Page 2 of 3 FirstFirst 123 LastLast
Results 11 to 20 of 26

Thread: How do I do a realistic color change on a realistic fractal map ?

  1. #11
    Guild Artisan Freodin's Avatar
    Join Date
    Oct 2010
    Location
    Germany
    Posts
    513

    Default

    How about that?

    Click image for larger version. 

Name:	Fade.jpg 
Views:	41 
Size:	30.1 KB 
ID:	70904

    Very quickly done... but is that about what you want?

  2. #12
    Guild Expert johnvanvliet's Avatar
    Join Date
    Jul 2012
    Location
    N 42.39 W 83.44
    Posts
    1,091
    Blog Entries
    4

    Default

    i guess i was assuming that you were using a "feather" of the edge
    or
    a fuzzy brush as an eraser on the top layer

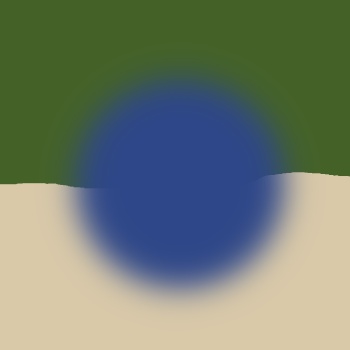
    1) circle select
    2) 150 PX "feather"
    3) bucket fill


    also if the sand color is on the layer UNDER the green
    you can use the eraser set at ? 20% and selectively remove some of the top layer
    Last edited by johnvanvliet; 02-16-2015 at 01:40 PM.
    --- 90 seconds to Midnight ---
    --------

    --- Penguin power!!! ---


  3. #13
    Guild Artisan
    Join Date
    Sep 2014
    Location
    Paris & Berlin
    Posts
    610

    Default

    Quote Originally Posted by Freodin View Post
    How about that?

    Click image for larger version. 

Name:	Fade.jpg 
Views:	41 
Size:	30.1 KB 
ID:	70904

    Very quickly done... but is that about what you want?
    Yes that's about the idea. I would make the transition band much wider so that one can't really tell where the green stops and the yellow starts but that could be probably done.
    How did you do that ?

  4. #14
    Guild Artisan
    Join Date
    Sep 2014
    Location
    Paris & Berlin
    Posts
    610

    Default

    Quote Originally Posted by johnvanvliet View Post
    also if the sand color is on the layer UNDER the green
    you can use the eraser set at ? 20% and selectively remove some of the top layer
    No I didn't try that.
    But I think I see what you mean. Having
    1) B&W texture
    2)Green
    3) Yellow

    I could try to remove some green from the green layer so that some yellow shows through from below. Problem being of course that this "removing" should be done in a very irregular way so that one doesn't see obvious traces of the eraser.
    Generally the problem I get when there are several layers is that everything gets too dark.

  5. #15
    Guild Artisan Freodin's Avatar
    Join Date
    Oct 2010
    Location
    Germany
    Posts
    513

    Default

    Quote Originally Posted by Deadshade View Post
    Yes that's about the idea. I would make the transition band much wider so that one can't really tell where the green stops and the yellow starts but that could be probably done.
    If you make the transition zone too wide, it looks rather weird... you have to play with the settings a litte.

    How did you do that ?
    Most simple. Two layers. One green, with some texture added. Above it, a yellowish layer, with some texture added. On the yellow layer, add a layer mask, coloured black. Switch to "Show Layer Mask" to be able to paint on it directly. (It's in the layers context menu)

    Use a white brush and paint where the "desert" should be shown. Apply a largish gaussian blur (I think I used 100px for this example)... that's where you define how large the transition zone is.

    Unselect "show layer mask"... and you should be done.

  6. #16
    Guild Artisan
    Join Date
    Sep 2014
    Location
    Paris & Berlin
    Posts
    610

    Default

    OK, thanks. My Gimp knowledge is not sufficient to currently use masks and to know what I am doing. Never used "show layer mask" sofar. I will try to see what I can do with that method.
    It is not eaxctly what I imagine but much better than an ugly sharp boundary.
    At worst I'll learn something new about GIMP

  7. #17
    Banned User
    Join Date
    Jul 2014
    Location
    Traverse City, Michigan, USA
    Posts
    2,547

    Default

    There are two things that I do about this problem.

    1. I try to put something on the boundary that breaks it naturally, such as forest, river, mountain range, etc.

    If I can't do that,

    2. I make two layers of the two colors, then use a soft (0 hardness) brush to erase the overlap areas until they kinda fade together. This lets you add or subtract color with soft brushes until you get the look you want, then merge the layers together.

  8. #18
    Guild Expert johnvanvliet's Avatar
    Join Date
    Jul 2012
    Location
    N 42.39 W 83.44
    Posts
    1,091
    Blog Entries
    4

    Default

    all this comes back around to skills learned in colorizing B&W images like this one

    http://tutorialgeek.blogspot.com/201...otos-from.html

    think of the tutorials as the end of chapter exercises in your textbooks from primary and secondary school
    --- 90 seconds to Midnight ---
    --------

    --- Penguin power!!! ---


  9. #19
    Administrator ChickPea's Avatar
    Join Date
    Jan 2015
    Location
    Sunny Scotland
    Posts
    6,884

    Default

    My skills aren't that great, but for what it's worth, I use Selection / Feather tool a lot when I want to blend. It can't be used in every scenario, but works great when you want to remove the edge from a block of colour.

  10. #20
    Guild Artisan
    Join Date
    Sep 2014
    Location
    Paris & Berlin
    Posts
    610

    Default

    Quote Originally Posted by johnvanvliet View Post
    all this comes back around to skills learned in colorizing B&W images like this one

    http://tutorialgeek.blogspot.com/201...otos-from.html
    Thanks but I know how to color B&W images, that's easy. In this tutorial everything is just plain sharp boundary. My problem is opposite - I need to get rid of sharp boundaries and get a color difusion pattern.

Page 2 of 3 FirstFirst 123 LastLast

Posting Permissions

  • You may not post new threads
  • You may not post replies
  • You may not post attachments
  • You may not edit your posts
  •