Page 1 of 2 12 LastLast
Results 1 to 10 of 15

Thread: synesthetic heightmap from image

  1. #1
    Guild Expert johnvanvliet's Avatar
    Join Date
    Jul 2012
    Location
    N 42.39 W 83.44
    Posts
    1,091
    Blog Entries
    4

    Default synesthetic heightmap from image

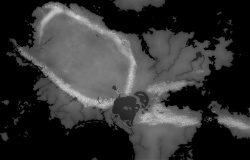
    a synesthetic heightmap from image

    " easier said then done "

    -----------------

    first the disclaimer

    there is NO "great" or "set" way to convert a image into a heightmap !

    second

    EVERY image is going to be a bit different !

    and depending on the starting point different ways / tools can be used

    a black and white copy of a SHADED RELIEF MAP IS NOT !!! a HeightMap

    heightmaps are the Z axis in a x,y,z 3d coordinates
    in this case the distance away from the center of a planet


    this is from a question i was asked
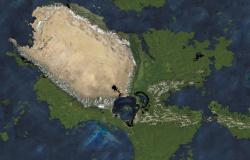
    how to convert this painted map ,using copy/past and the clone tool and painting into a HeightMap


    first thing is LOOK and i mean really look at the image

    because you will need to make masks ( i used to do this in the photo Darkroom and using a computer is WAY!!!! easier )

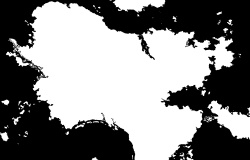
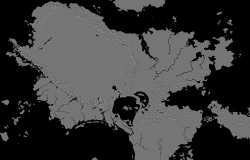
    first one is a ocean & lakes mask
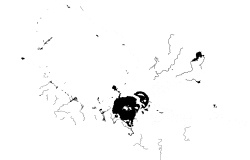
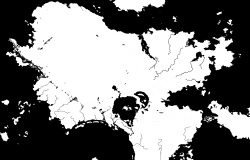
    the second is the WATER mask ( ocean .lakes, and RIVERS )

    then a mask for just mountains
    and if needed one for just low rolling hills


    the more masks and using small areas the better the quality and MORE TIME needed so for this i am using just the basics
    and all FREE GPL'ed software that can be used on ( or free and using WINE)
    Linux
    Apple
    And
    Microsoft Windows

    Gimp and the G'Mic plugin
    gimp 2.8.4 will make a 8bit heightmap
    Gimp 2.9.4 DEVELOPMENT ( will be gimp 2.10) can make a 16 or 32 bit heightmap

    and the plugin for Gmic

    " select by color" is a great tool for SOME images
    both "connected area" and "all image" tools can be used

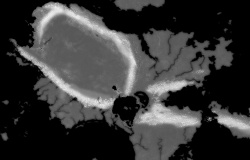
    for others the gmic plugin tool "Repair / Local similarity mask" can be used


    other useful tools are the Gmic

    "Contours / Curvature"
    "Contours / Distance Transform"
    "Contours / Isophotes "


    you need to get clues from the image in question

    for this one the desert area in the mountain ring looks to be a bit higher than the land around it


    and most of the rivers are LIGHT brown for a mask these need to be darker than the green area

    making masks can take some time
    Last edited by johnvanvliet; 10-08-2017 at 08:43 PM.
    --- 90 seconds to Midnight ---
    --------

    --- Penguin power!!! ---


  2. #2
    Guild Expert johnvanvliet's Avatar
    Join Date
    Jul 2012
    Location
    N 42.39 W 83.44
    Posts
    1,091
    Blog Entries
    4

    Default

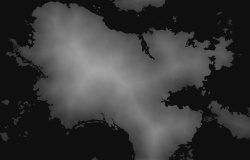
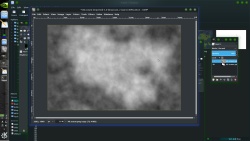
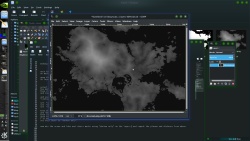
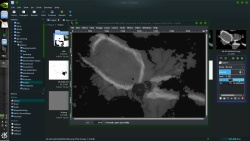
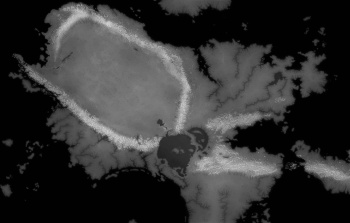
    once the masks are done i use a combination of "distance transform" and "plasma noise"
    on masks and images to synthetically make a heightmap

    open the ocean mask in gimp
    in layers duplicate it


    select the upper layer and in the gmic menu select "rendering / plasma"
    the default values will do


    then click the "eye symbol" to hide that layer and select the lower layer
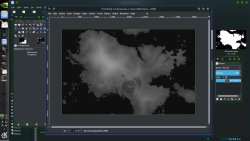
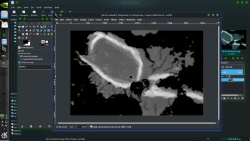
    and invert the color of the lower image layer

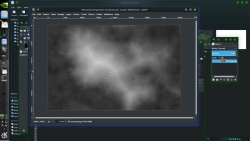
    and use the Gmic tool
    "contours / distance transform"

    set "value" to 255
    set "metric" to Euclidean
    set "normalization" to normalize

    then blend the two layers by setting the upper to "50%" transparent
    and "merge down"
    then lower the contrast a bit


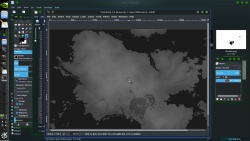
    open the "ocean" mask again and copy/past it on to the current image
    ( or make 3 layers but if the image is BIG this will take time and RAM!!!)
    set this layer to "darken only"


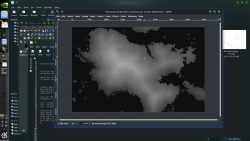
    now mix the ocean and lake and rivers masks using "darken only" on the layers and repeat the plasma and distance from above


    do some dodging and burning ( i like to use one of the "bush" brushes and for this set to 120 pixels
    and blend these two images

    this is the base for the land


    now this map has VERY LOW shaded relief shadows ( some will have MAJOR shadows and you will NOT be able to use this "cheat"

    -- NOTE!!!!
    this uses the terminal version of G'Mic and it dose work using MS's "cmd.exe" )
    Code:
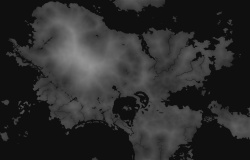
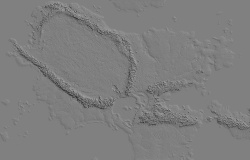
    gmic 4k.posterlarge.png --split_freq 0.06% -n[2] 1,255 -o[2] hi.pgm

    open in gimp and paste the mask layers as "darken only"
    and after applying the masks


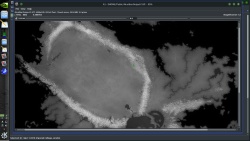
    this makes a image of just the VERY high frequency data in the image
    mainly the white mountain tops ( this is a CHEAT)

    dodge some of the mountain area


    now duplicate the layer and add a 13px blur and set the top layer to "grain merge"
    repeat with 21 px blur "grain merge"
    and 31 pixels "grain merge"

    then a few duplicate / blur/ BUT LIGHTEN ONLY on the layers

    adjust the gama point so that the low areas are a bit darker
    ( 0.8 ot 0.6 should do)


    -- like i said this is a CHEAT do to the very low amount of shadows !!!!!

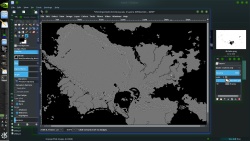
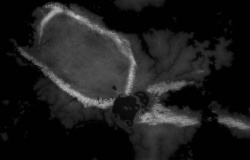
    now blend the two
    the "noise and distance " with the highpass above
    then "normalize
    ( color / auto / normalize )

    this stretches the tones to 0 to 255


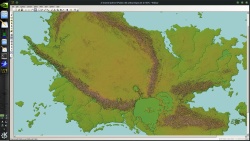
    time for wilbur
    Last edited by johnvanvliet; 01-05-2017 at 08:17 PM.
    --- 90 seconds to Midnight ---
    --------

    --- Penguin power!!! ---


  3. #3
    Guild Expert johnvanvliet's Avatar
    Join Date
    Jul 2012
    Location
    N 42.39 W 83.44
    Posts
    1,091
    Blog Entries
    4

    Default

    For Wilbur i like to use the 32 bit BT format

    resave the base map as a 32bit floating point
    gmic and Nip2 can do this just fine

    use GDAL to convert to bt
    Code:
    gdal_translate -of bt  basemap.tiff WilburInput.bt
    run a few Cycles of precipitation based erosion and incise flow

    and export to bt
    ( 32 bit has + and - pixel values )

    and use gdal to convert to a 32 bit tiff


    and a 8 bit normalized copy of the float


    for lower coastal area drop the GAMA to say 0.6
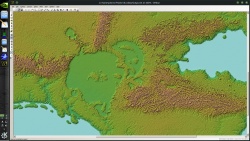
    then run through wilbur

    shaded using the gimp "bumpmap" shader and a 8 bit copy of the heightmap


    .
    Last edited by johnvanvliet; 01-06-2017 at 12:41 AM.
    --- 90 seconds to Midnight ---
    --------

    --- Penguin power!!! ---


  4. #4
    Guild Journeyer Facebook Connected ranger's Avatar
    Join Date
    May 2012
    Location
    Wyoming
    Posts
    112

    Default

    WOW thank you soo much!!

  5. #5
    Guild Journeyer Facebook Connected ranger's Avatar
    Join Date
    May 2012
    Location
    Wyoming
    Posts
    112

    Default

    what is this coverting to 32 bit thing etc

  6. #6
    Guild Expert johnvanvliet's Avatar
    Join Date
    Jul 2012
    Location
    N 42.39 W 83.44
    Posts
    1,091
    Blog Entries
    4

    Default

    see:
    https://en.wikipedia.org/wiki/Image_file_formats

    a everyday red green blue digital image is 3 8 bit images
    each layer has pixel values form 0 to 255

    a 16 bit per layer image has values 0 to 65535
    a SIGNED 16 bit per layer image has values-32768 to +32767

    a single precision float has ( 2 to the power of 31 minus 1 ) numbers
    231 − 1 = 2,147,483,647

    and can be positave or negitave values

    tiff and OpenEXR are two 32 bit / layer image formats
    and so is the "vips" format i use a lot

    most DEM's ( height maps) are signed 16 bit data
    tiff sort of handles this as a 32 bit float ( it is a ancent image format after all -- but VERY handy for height data
    --- 90 seconds to Midnight ---
    --------

    --- Penguin power!!! ---


  7. #7

    Default

    Quote Originally Posted by skymeandr View Post
    I love this synthesis of GIS tools/thinking and image manipulation!
    Awesome stuff, thanks for sharing John, I'm glad I found this.
    Last edited by CharlieP; 10-19-2021 at 03:09 PM.

  8. #8

    Praise

    I love this synthesis of GIS tools/thinking and image manipulation!

  9. #9
    Guild Novice Facebook Connected Jeffmaster223's Avatar
    Join Date
    Feb 2017
    Location
    California
    Posts
    13

    Default

    Hey John, loved the tutorial.

    But i'd love to see a tutorial on how you made this:
    http://imgbox.com/SAe04IkP

    I love how it looks like it was on Google Earth. Could you suggest (or make) a tutorial on that? Thanks.

  10. #10
    Guild Journeyer Facebook Connected ranger's Avatar
    Join Date
    May 2012
    Location
    Wyoming
    Posts
    112

    Default

    Quote Originally Posted by Jeffmaster223 View Post
    Hey John, loved the tutorial.

    But i'd love to see a tutorial on how you made this:
    http://imgbox.com/SAe04IkP

    I love how it looks like it was on Google Earth. Could you suggest (or make) a tutorial on that? Thanks.
    I was the one that made this wanting help to make a height map hah!! I actually have a tutorial on how to make this style.

Page 1 of 2 12 LastLast

Posting Permissions

  • You may not post new threads
  • You may not post replies
  • You may not post attachments
  • You may not edit your posts
  •